The Baker's Percentage Behind This Loaf
| Ingredient / Metric | Weight (Grams) | Baker's % | Functional Purpose |
|---|---|---|---|
| Unbleached Bread Flour (12.7% protein) | 450g | 90.0% | Primary gluten matrix & structural lift |
| Stoneground Whole Wheat Flour | 50g | 10.0% | Nutrient density, microbial activity & aroma |
| Filtered Lukewarm Water (28°C / 82°F) | 360g | 72.0% | Hydration for starch gelatinization & crumb |
| Active Sourdough Levain (100% hydration) | 100g | 20.0% | Inoculation of wild yeast & lactic bacteria |
| Fine Sea Salt | 10g | 2.0% | Tightens gluten network & balances fermentation rate |
What 72% Hydration Actually Means for Your Dough
Sourdough bread relies on the symbiotic fermentation between wild yeasts (primarily Candida humilis and Saccharomyces cerevisiae) and lactic acid bacteria (Lactobacillus sanfranciscensis). The lactic acid bacteria produce lactic and acetic acids, which lower the dough's pH to around 3.8 to 4.2. This acidity alters the gluten structure, strengthening dough extensibility while slowing starch retrogradation, keeping the baked bread naturally fresh for days without chemical preservatives.
That partnership is more specific than it first appears. The wild yeasts are responsible for almost all of the gas — carbon dioxide produced as they metabolize simple sugars — while the bacteria contribute comparatively little lift and almost all of the flavor. The two organisms coexist because they eat differently: the dominant lactobacilli in a mature starter prefer maltose, which the yeasts largely ignore, so neither starves the other out. This is also why a healthy starter is remarkably resistant to contamination. The acid it generates makes the environment hostile to most spoilage organisms, which is the same principle that preserves yogurt, sauerkraut and salami.
The ratio of the two acids the bacteria produce is what people are really describing when they call a loaf 'sour.' Lactic acid is mild, milky and rounded; acetic acid is the sharp, vinegary note. Warm, wet, frequently fed starters favor lactic acid and taste gentle and creamy. Cooler, stiffer, less frequently fed starters shift toward acetic acid and taste noticeably tangier. This gives you a genuine flavor dial: nothing in the formula needs to change to make a loaf more or less sour, only the temperature and hydration of the culture that leavens it.
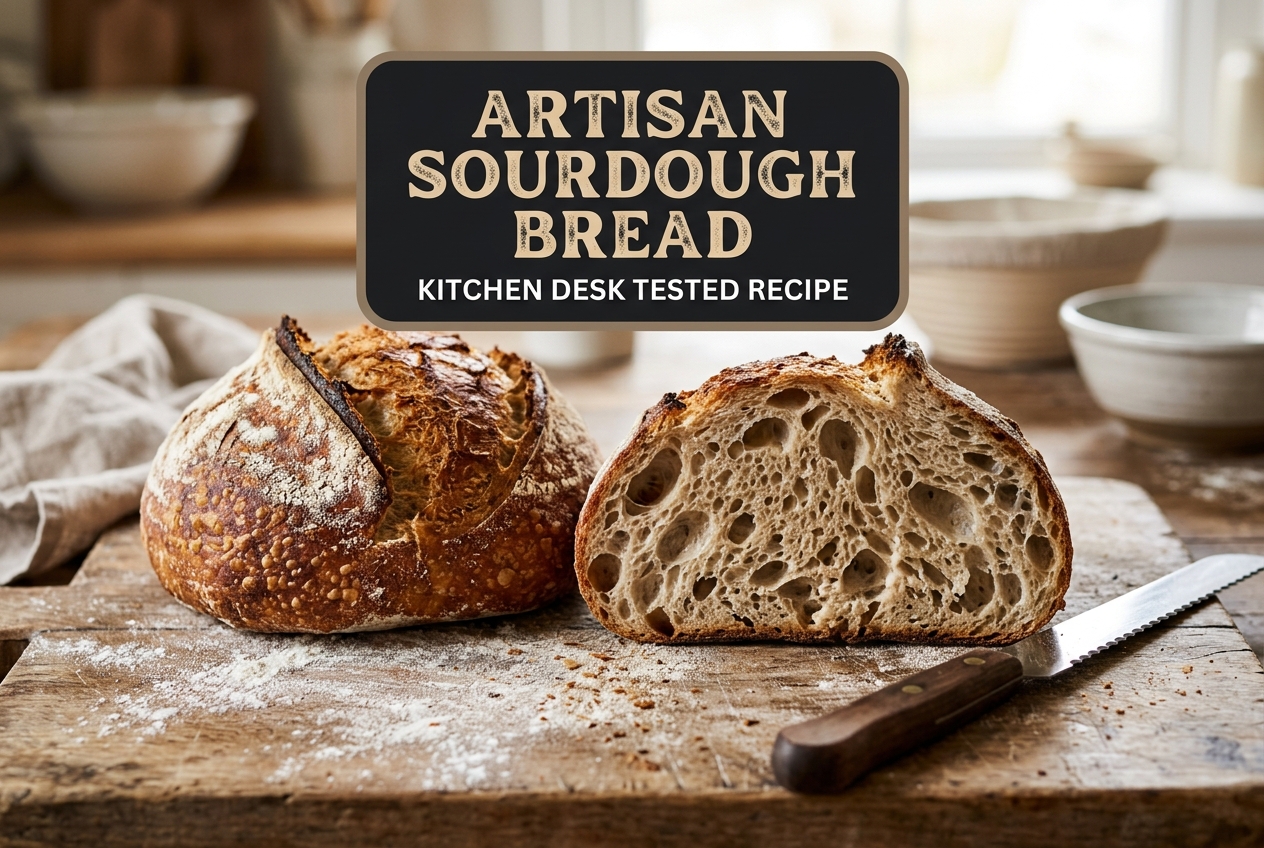
Hydration — 72% here, meaning 360g of water for every 500g of flour — governs both crumb structure and how the dough feels in your hands. Water is what allows starch granules to swell and gelatinize in the oven, and it is what lets gas bubbles expand into the large irregular holes associated with artisan bread. Push hydration higher and the crumb opens further, but the dough slackens and demands more skilled handling. Drop it lower and the loaf becomes tighter, more sandwich-like, and considerably easier to shape. 72% sits deliberately at the point where the crumb is genuinely open but the dough still holds a shape on the bench.
The autolyse — flour and water rested together before salt and starter arrive — works because flour is not inert. Once wetted, its native proteases and amylases begin breaking down protein and starch, while glutenin and gliadin link into an elastic gluten network without any mechanical work from you. Salt is withheld deliberately: it tightens gluten and slows enzyme activity, both of which you want later rather than during hydration. Forty-five minutes of doing nothing accomplishes what several minutes of kneading otherwise would, and it is the reason this dough needs no mixer.
The cold retard performs three jobs at once and is the single step most responsible for the loaf's character. At 4°C, yeast activity nearly stops while the bacteria keep working slowly, so flavor deepens for twelve hours without the dough over-proofing. The chilled dough also becomes firm enough to score cleanly, which is what produces a defined ear rather than a smear. And a cold loaf entering a 240°C Dutch oven takes longer to reach the temperature at which the crust sets, giving the interior more time to expand — the burst of oven spring that separates a tall loaf from a flat one.
Steam during that first twenty minutes is not optional. In a covered Dutch oven, moisture escaping the dough is trapped and keeps the surface pliable, letting it stretch as gases expand rather than setting into a rigid shell too early. Once the lid comes off, the dry heat finally allows the crust to darken through Maillard browning and caramelization, producing the blistered mahogany exterior and much of the loaf's aroma. Bake in a dry oven from the start and you get the same bread with a third less volume and a dull, pale crust.
Key Advantages & Science
- ✓Natural wild yeast fermentation produces superior depth of complex sour-wheaty flavor.
- ✓Easier to digest as fermentation breaks down complex starches and phytic acid.
- ✓72% hydration gives an open airy crumb while remaining manageable for beginner hands.
- ✓Long shelf life without artificial preservatives.
Important Considerations
- !Requires a 24 to 36-hour total cycle including starter feedings and cold retard.
- !Requires dedicated equipment such as a cast iron Dutch oven and proofing banneton.
- !Highly sensitive to ambient room temperature changes.
Equipment, Including What You Can Skip
Ingredients
Checklist- 450g Unbleached Bread Flour (12.7%+ protein)
- 50g Whole Wheat Flour
- 360g Lukewarm Water (28°C / 82°F) (72% hydration)
- 100g Active Sourdough Starter (fed 4–6 hrs prior, at peak rise)
- 10g Fine Sea Salt (2%)
- Rice flour (for dusting banneton)
Step-by-Step Method
- 1 Autolyse (Enzyme Activation): In a large mixing bowl, combine bread flour, whole wheat flour, and 340g of the water. Mix by hand until no dry flour remains. Cover and rest for 45 minutes. This allows flour proteins to fully hydrate and form gluten bonds naturally.
- 2 Inoculation (Adding Starter & Salt): Dimple the 100g active sourdough starter over the dough. Sprinkle the 10g sea salt and drizzle the remaining 20g water. Use the Rubaud kneading method (scooping and stretching upward) for 4 minutes until the dough becomes silky and homogenous.
- 3 Bulk Fermentation & Stretch-and-Folds: Keep dough in a warm environment (26°C / 78°F). Over the next 2 hours, perform 4 sets of stretch-and-folds spaced 30 minutes apart. To fold, wet your hands, grab one side of the dough, pull it upward, and fold it across the top. Rotate bowl 90° and repeat on all 4 corners.
- 4 Rest & Volume Growth: Let the dough rest undisturbed for another 2 to 3 hours until it expands approximately 50% in volume, exhibits glossy rounded edges, and shows small bubbles under the surface.
- 5 Pre-Shaping: Turn dough gently onto a lightly floured countertop. Use a bench scraper to roll the dough into a loose, round ball. Let rest uncovered for 20 minutes to relax gluten.
- 6 Final Shaping & Cold Retard: Dust the top with flour, flip over, fold the bottom up, sides in, and roll into a tight cylinder (batard). Dust your banneton with rice flour. Transfer dough seam-side up into the banneton. Seal inside a plastic bag and refrigerate at 4°C for 12 to 16 hours.
- 7 Baking with Steam: Preheat your Dutch oven inside the oven at 240°C (465°F) for 45 minutes. Tip the cold dough onto parchment paper. Score down the center at a 30° angle with a razor blade. Drop into the Dutch oven with 2 ice cubes, cover with the lid immediately, and bake for 20 minutes. Remove lid, reduce oven to 220°C (425°F), and bake for an additional 20 minutes until deep mahogany.
Sourdough Fault Diagnosis
| Symptom | Most Likely Cause | Correction |
|---|---|---|
| Flat loaf, dense gummy crumb | Over-fermented bulk rise, or an underpowered starter | Watch volume rather than the clock — stop at 50% growth; feed the starter twice daily for three days before baking |
| Tight, closed crumb with small even holes | Under-fermented, or hydration too low for the flour | Extend bulk by 45-60 minutes at 26°C; if the dough felt stiff, add 15-20g water next time |
| No ear, score healed shut | Dough too warm at scoring, or the cut was too shallow and vertical | Score straight from the fridge, 1cm deep, blade held at 30 degrees to the surface |
| Large tunnel or cavern under the crust | Trapped air from loose final shaping, or dough degassed unevenly | Roll the batard tighter and press out large bubbles during pre-shape |
| Pale, soft, leathery crust | Insufficient steam, or the loaf came out before the crust set | Preheat the Dutch oven a full 45 minutes and bake the uncovered phase to deep mahogany, not golden |
| Sticks to the banneton | Wheat flour used for dusting, or the basket was under-floured | Dust with rice flour only — it has no gluten and cannot bond to wet dough |
| Bread tastes bland, no sourness | Culture too young, or bulk fermentation too warm and short | Retard longer, up to 16 hours, and consider a stiffer, cooler starter to build acetic acid |
Test Kitchen Notes
Hydration, Flour and Schedule Variations
Toast 60g of mixed sesame, sunflower, flax and pumpkin seeds, then soak them in 60g water for an hour before laminating them into the dough during the second stretch-and-fold. Toasting is what develops the flavor and soaking prevents the seeds from stealing water from the crumb.
Shift the ratio to 350g bread flour and 150g whole wheat. Bran fragments cut gluten strands, so raise hydration to about 75% and shorten bulk fermentation by 30-45 minutes — whole grain ferments considerably faster than white flour.
Fold in 100g of roughly chopped pitted Kalamata olives and a tablespoon of finely chopped rosemary at the final fold. Pat the olives dry first; excess brine both softens the dough and inhibits fermentation.
Drop hydration to 68%, add 25g olive oil and 15g honey, and bake in a covered loaf tin at 220°C for 40 minutes. The result is a tighter, softer, straight-sided crumb suited to slicing thin for toast and sandwiches.
Keeping a Loaf: Crust, Crumb and Reviving It
Store the cooled loaf cut-side down directly on a wooden board or in a paper bag, never in plastic. Sourdough's acidity gives it a genuine three-to-four-day shelf life at room temperature, but plastic traps the moisture leaving the crumb and turns the crust soft and leathery within hours. Refrigeration is the one thing to avoid entirely: temperatures just above freezing accelerate starch retrogradation, so a loaf goes stale several times faster in the fridge than on the counter. For longer storage, slice the whole loaf once it is completely cool, freeze the slices flat in a sealed bag, and toast them directly from frozen — this loses almost nothing and means you never waste half a loaf. A whole loaf also freezes well for up to three months if wrapped tightly; thaw it at room temperature still wrapped, then refresh it in a 180°C oven for 10 minutes to crisp the crust back up. Day-three bread that has gone dry is not a failure, it is the raw material for croutons, breadcrumbs, panzanella and French toast, all of which are better made with stale bread than fresh.