Why Soufflé Pancakes Fail
| Symptom | Underlying Cause | Prevention |
|---|---|---|
| Meringue never stiffened | Fat or yolk in the bowl, or plastic bowl | Use scrupulously clean metal or glass; separate cold |
| Collapsed flat in the pan | Over-folded, so the air was knocked out | Fold in three additions; stop while streaks remain |
| Burnt base, raw centre | Heat too high | Lowest possible flame; preheat gently for 3-4 minutes |
| Sank the moment the lid came off | Interior not set; whites under-whipped | Steam the full 5 minutes each side, lid closed |
| Wet and eggy in the middle | Too thick for the cooking time | Keep mounds under 5cm; add 2 minutes if needed |
| Spread sideways instead of up | Batter too loose, meringue too soft | Whip to genuinely stiff peaks before folding |
| Grainy, weeping meringue | Over-whipped past the stiff-peak stage | Stop as soon as the peak holds with a curling tip |
| Deflated on the plate | Normal contraction, made worse by waiting | Plate and serve within a minute of the pan |
Meringue Stability, and Why These Collapse
Unlike standard flat pancakes that rely primarily on chemical leaveners (baking powder), soufflé pancakes rely on trapped air in whipped egg white protein matrices. When cooked with steam under a closed lid at low temperature, trapped water vapor expands the air cells without burning the bottom.
The meringue is the entire structure of this pancake, so understanding what happens inside it explains every rule in the recipe. Egg white is about 90 percent water and 10 percent protein, and whisking does two things simultaneously: it forces air into the liquid as bubbles, and it mechanically unfolds the protein molecules — mainly ovalbumin and globulins — so that their water-repelling regions, normally tucked inside, are exposed. Those exposed regions migrate to the surface of each air bubble and link up with their neighbours, forming an elastic film that holds the bubble against collapse. A stiff meringue is not simply foam; it is a protein scaffold with air trapped inside it.
Sugar added gradually is what makes that scaffold durable rather than brittle. Sugar dissolves into the water phase and thickens it, slowing the drainage of liquid away from the bubble walls, which is the main way a meringue collapses. It also interferes slightly with protein bonding, which sounds bad but is actually protective — proteins that bond too tightly form a rigid network that cracks and weeps. This is why you add sugar in three stages rather than all at once: too much too early weighs down the foam and it never reaches volume, while none at all gives you a meringue that peaks quickly and then leaks water within minutes.
The lemon juice is a stabiliser working on pH. Egg white sits at around pH 9, which is quite alkaline, and at that pH the proteins carry relatively little net charge and bond to each other readily — leading to over-whipping and a grainy, curdled foam. A teaspoon of lemon juice drops the pH toward 7 or 8, increasing the electrical repulsion between protein molecules so they link more gently and the foam tolerates more whisking before it breaks. Cream of tartar does exactly the same job, and a copper bowl achieves it by a different mechanism entirely, with copper ions binding to the sulfur groups in the proteins.
Chilled whites and a scrupulously clean bowl are not fussiness. Any fat — a speck of yolk, an oily film on a plastic bowl — competes with the proteins for space at the air-water interface, and fat molecules cannot form an elastic film, so bubbles collapse wherever fat sits. This is the single most common reason a meringue refuses to whip. Cold whites whip slightly more slowly than room-temperature ones but produce a more stable foam, which for this recipe is the better trade, since the batter has to survive folding and then sit in a piping bag while the first pancakes cook.
Folding is where most attempts are lost, and the physics is unforgiving. Every stroke of the spatula shears some bubble walls and releases their air, so the number of strokes matters more than the technique. Adding the meringue in three parts solves this: the first third is sacrificial, stirred in fairly roughly to loosen the dense yolk batter so that the remaining two-thirds can be folded in with very few strokes. Cut down through the middle, sweep along the bottom, lift and rotate the bowl — and stop while faint streaks of white are still visible, because the batter continues homogenising as you scoop it.
Cake flour is specified for a reason that matters at this scale. It is milled from soft wheat and contains around 7 to 8 percent protein against 10 to 12 in all-purpose, so it forms far less gluten when it meets liquid. Gluten is elastic and strong, which is exactly wrong here — a gluten network would resist the expansion of the air cells and give you a chewy, rubbery pancake rather than a custardy one. Cake flour is also more finely milled and chlorinated, which lets it absorb liquid quickly and set with a tender crumb.
The lid and the teaspoon of water are the cooking method, and they are the reason these can be four centimetres tall without burning. Water hitting the hot pan flashes to steam, and a closed lid holds that steam at essentially 100°C — cooking the top and interior of the pancake through hot vapour rather than conducted heat. Meanwhile the pan surface stays at a low enough temperature that the base browns slowly. The steam also does mechanical work: as the trapped air cells warm, the gas inside expands according to the gas laws, roughly a third in volume between room temperature and 100°C, and water in the batter turning to vapour expands those cells further. This is the actual lift.
The final structure sets when the proteins coagulate. Egg white proteins begin denaturing around 62°C and set fully by about 65°C, and the yolk proteins and flour starches set in a similar range; once that happens, the walls of every air cell become rigid and the pancake holds its height. Deflation after cooking is inevitable to a degree, because the expanded steam condenses back to liquid and the gas cools and contracts — a set protein wall resists this but cannot ignore it. This is why they must be eaten within a minute or two of leaving the pan.
Key Advantages & Science
- ✓Delightful jiggly, melt-in-the-mouth texture
- ✓Stunning visual presentation
- ✓Low calorie density
- ✓No specialist equipment beyond a hand mixer and a lidded pan
- ✓Naturally low in fat compared with buttermilk pancakes
Important Considerations
- !Must be served immediately before deflation
- !Requires precision meringue whipping
- !Cooks slowly — around 10 minutes per batch of two
- !Almost impossible to scale up for a crowd
Ingredients
Checklist- 2 Egg Yolks
- 3 Chilled Egg Whites
- 2 tbsp Milk
- 1/2 tsp Vanilla
- 3 tbsp Cake Flour
- 1/2 tsp Baking Powder
- 2.5 tbsp Sugar
- 1 tsp Lemon Juice
- Butter or neutral oil, for the pan
Step-by-Step Method
- 1 Separate & Chill: Separate the eggs while cold, putting the three whites in a spotlessly clean metal or glass bowl — any trace of yolk or grease will stop the meringue whipping. Keep the whites in the refrigerator until you need them.
- 2 Yolk Batter: Whisk the yolks, milk, and vanilla until pale and slightly thickened, then sift in the cake flour and baking powder and whisk just until smooth. Sifting is worth doing; three tablespoons of flour lumps easily in this little liquid.
- 3 Meringue: Whip the chilled whites with the lemon juice on medium speed until foamy, then add the sugar in three additions, whipping to stiff glossy peaks. The peak should stand upright when the beater is lifted with only the very tip curling over — soft peaks will not hold the height, and dry, grainy peaks have gone too far.
- 4 Fold: Stir one-third of the meringue into the yolk batter fairly briskly to loosen it, then fold in the remaining two-thirds in two additions using a cutting-and-lifting motion. Stop while a few faint white streaks remain; over-folding is the most common failure.
- 5 Preheat the Pan: Set the nonstick pan over the very lowest heat with a light film of butter or oil, wiped almost dry with kitchen paper. Give it three or four minutes to come to an even, gentle temperature — a pan that is too hot burns the base long before the middle sets.
- 6 Steam Cook: Scoop or pipe three tall mounds of batter into the pan, keeping them separate. Add 1 tsp of water to a bare spot in the pan, cover tightly, and steam on the lowest heat for 5 minutes without lifting the lid.
- 7 Second Scoop & Flip: Add another small scoop of batter on top of each pancake to build height, then slide a thin spatula underneath and flip gently. Add another teaspoon of water, cover, and steam 5 more minutes until the sides feel set and springy.
- 8 Serve Immediately: Transfer to warmed plates, dust with powdered sugar, and serve at once. They begin losing height within a minute of leaving the pan, so have everything else on the table before you start cooking.
Rings, Lids and the Rest of the Kit
Pancake Styles Compared
| Style | Thickness | Texture | Primary Leavener |
|---|---|---|---|
| American Buttermilk | 1.0 - 1.5 cm | Dense, fluffy, cake-like | Baking powder & baking soda |
| Japanese Soufflé | 4.0 - 5.0 cm | Cloud-like, jiggly, custardy | Whipped egg white meringue |
| French Crêpe | 0.1 - 0.2 cm | Thin, delicate, chewy | None (unleavened) |
| Dutch Baby | 3.0 - 4.0 cm at the rim | Crisp edges, custardy centre | Steam from a high-liquid batter |
| Scotch Pancake / Drop Scone | 0.8 - 1.2 cm | Tight, slightly chewy crumb | Baking powder |
| Soufflé Omelette (Mère Poulard) | 5.0 - 6.0 cm | Airy, savoury, barely set | Whipped whole eggs |
Test Kitchen Notes
Flavours, Fillings and Sizes
Sift a teaspoon of good ceremonial-grade matcha in with the cake flour. The tannins in matcha are mildly astringent, so add an extra half tablespoon of sugar to balance them. Serve with sweetened red bean paste and a drift of whipped cream for the classic Japanese café presentation.
Replace one tablespoon of the cake flour with a tablespoon of Dutch-processed cocoa powder. Cocoa contains starch and fat, both of which weigh the batter down slightly, so whip the meringue to a firmer peak than usual and expect a marginally shorter rise. Excellent with mascarpone and raspberries.
Leave out the sugar, flour and vanilla, whip the whites with a pinch of salt instead of lemon, and fold them into two whole beaten eggs. Cook the same way, lidded over the lowest heat, and fold in Gruyère at the flip. This is essentially the Mont Saint-Michel omelette and it is remarkable.
Grease three 9cm metal ring molds or open-topped cookie cutters and set them in the pan, then pipe the batter inside to fill them two-thirds. The molds force the rise strictly upward and give perfectly cylindrical, café-style pancakes, though flipping them takes a spatula and some nerve. Run a knife around the inside before unmolding.
Getting Them to the Table Before They Fall
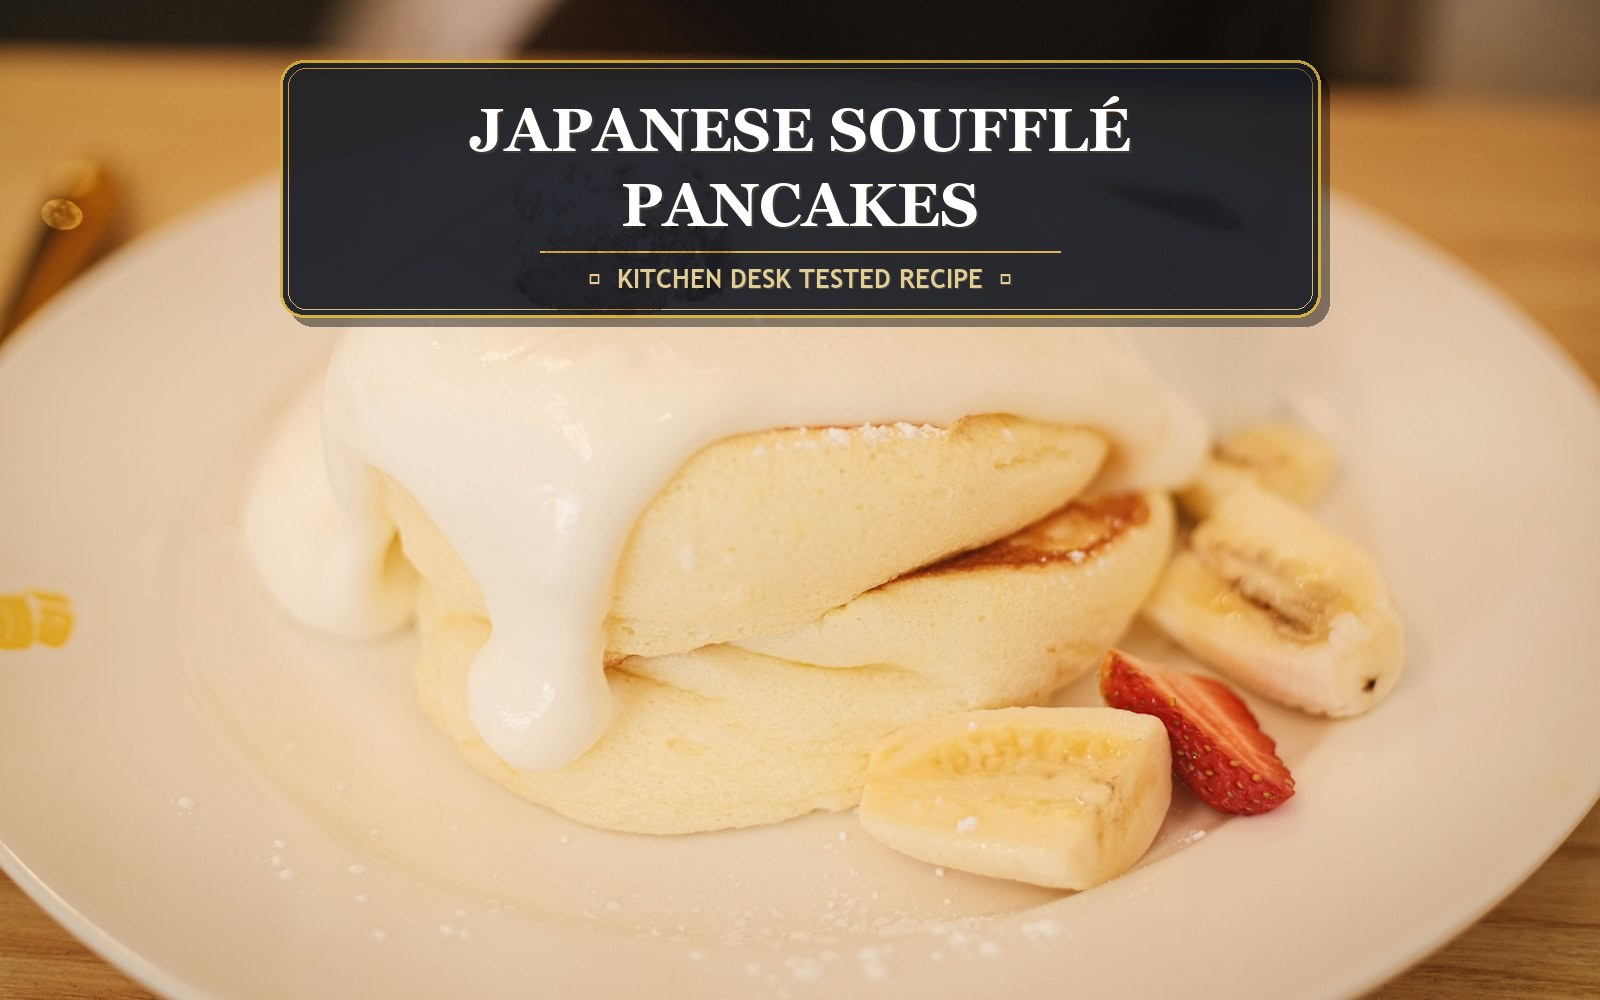
The whole point of these pancakes is the texture, so what goes on top should be light enough not to compress them. A dusting of powdered sugar through a fine sieve is the classic minimum, and it is genuinely enough. Beyond that, a spoonful of lightly whipped cream on the side rather than on top, a small jug of warmed maple syrup to pour at the table, and a scatter of fresh berries — strawberries, blueberries and raspberries all work — is the standard Japanese café presentation. Sliced banana, macerated strawberries, poached peaches, or a compote of blueberries cooked down with a squeeze of lemon are all excellent. On the savoury-adjacent side, a small knob of good salted butter melting into the top is superb, as is a spoonful of yuzu or lemon curd. Serve on warmed plates, two or three pancakes stacked loosely rather than pressed together, and bring them to the table the moment they leave the pan. Avoid anything heavy or wet poured directly over them — a thick syrup or a large scoop of ice cream will flatten a soufflé pancake within seconds. Drink strong coffee, matcha, or plain black tea; the pancakes are delicate and a sweet drink overwhelms them.