Why Wet Scallops Steam Instead of Browning
A scallop is roughly 78 to 80 percent water held inside a loose lattice of muscle protein, and that water is the whole problem. While there is liquid moisture sitting on the surface of the scallop, the pan it is in cannot climb past 100°C (212°F). Every bit of energy going into the metal is being spent turning water into steam instead of heating the food. Browning needs a surface somewhere between 140°C and 165°C (284°F to 329°F), which is a long way above the ceiling that surface water imposes. Miss that window and you have not seared a scallop, you have simmered it in its own juice. This is why the most useful thing you can do for a scallop happens before it ever touches the pan: dry it until the paper towel comes away clean.
Wet-packed scallops are soaked in a solution of sodium tripolyphosphate, and the label will usually say 'water added' or list STP somewhere in the small print. The phosphate makes the flesh take up water, often a third of its weight again, and it alters the outer proteins into something spongy and leaky. You can dry a wet-pack scallop forever and it will still weep in the pan, because the water is inside the muscle rather than on it. Dry-packed scallops are shucked and packed with no soak at all. They cost more and they look smaller for the same money, which is precisely the trade you are making: you are buying scallop instead of brine. If the counter label says 'dry' or 'diver', you are fine. If it says 'processed' or 'water added', save them for a curry.
Salting a scallop ten to fifteen minutes before it cooks pulls free water to the surface by osmosis, which sounds like the opposite of what you want until you see it happen. The surface goes glossy, and then you wipe that gloss away. What is left behind is a drier surface than patting alone could ever produce. From there the rules are simple. Use an oil with a high smoke point, avocado or grapeseed, and heat it until it shimmers and slides like water rather than sitting still. Lay the scallops in with an inch between them so the steam has somewhere to go. Then do nothing. A scallop releases from the pan on its own once a crust has formed underneath it, and pulling at it early tears the crust off and leaves the browned protein stuck to the metal.
Cast iron or carbon steel earns its place here for one reason: stored heat. Dropping four fridge-cold scallops into a thin aluminium pan knocks the surface temperature down by 60°C or more, and the pan then spends the next minute climbing back instead of browning anything. A heavy pan has enough thermal mass to absorb that hit and stay above the browning threshold. Get the pan properly hot before the oil goes in, a full five minutes over medium-high, and let the oil come up until it shimmers. If the oil is smoking hard the moment it hits the metal, you are already too hot, and the butter you add on the second side will scorch before the scallops are done. The pan should be at the smoke point, not past it.
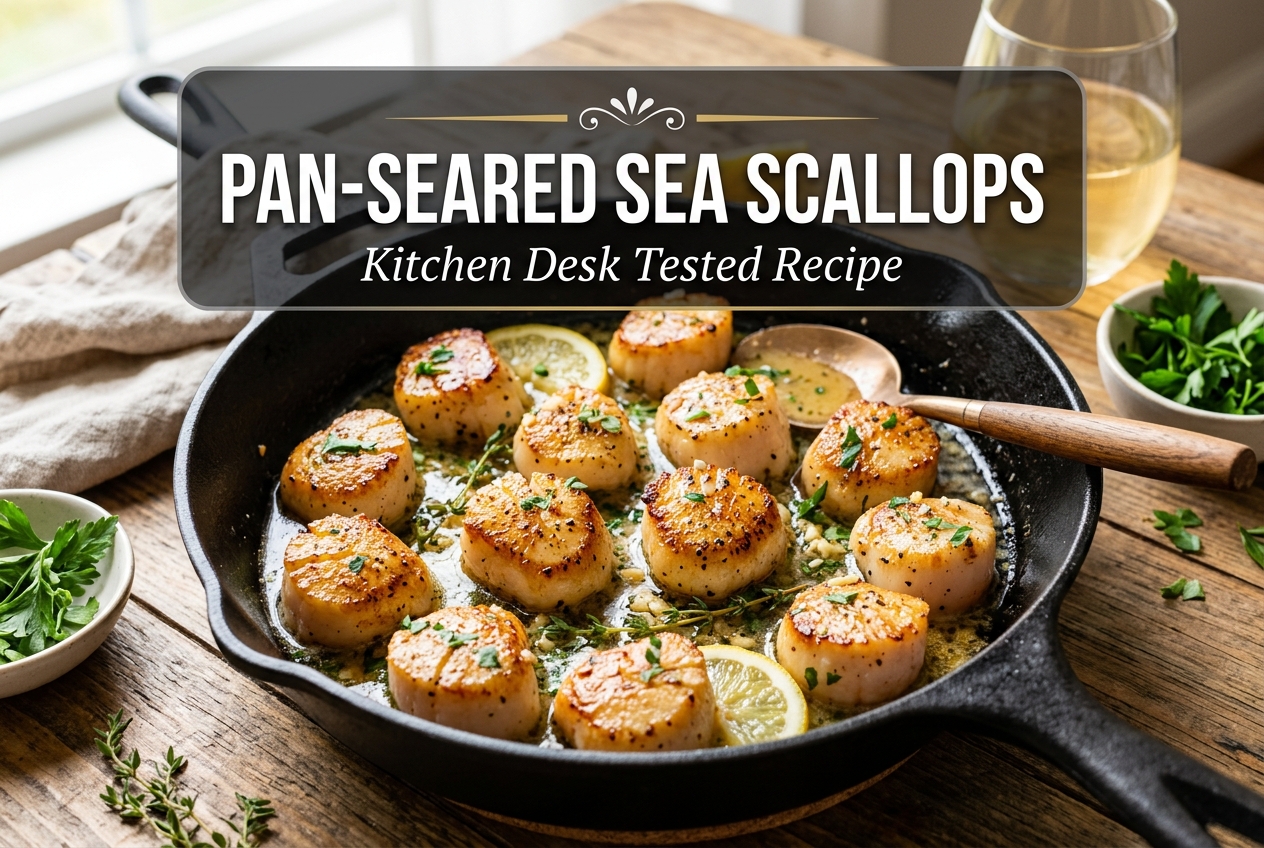
For a U-10 or U-12 scallop, roughly 25 to 30g each, the first side wants 90 seconds to two minutes and the second wants about half that. The visual cues are more reliable than the clock. A golden band will climb the side of the scallop by 2 to 3mm, and the top will turn from glassy to opaque. On the second side you are not trying to build a second crust, you are finishing the centre, so 45 to 60 seconds with foaming butter spooned over the top is plenty. Bay scallops cannot be seared this way at all. There is too little mass, so they dump their water into the pan instantly and steam in it rather than browning.
Scallops keep cooking after they leave the pan, and the effect is bigger than most people expect, three to five degrees over the two minutes they rest. That is why the pull temperature is 49 to 52°C (120 to 125°F) and not the 60°C you might instinctively think of as done. At 49°C the centre is still slightly translucent and the texture is custardy. By the time it has rested on a warm plate it has coasted into the low fifties and is exactly right. Take them to 60°C in the pan and carryover will land them near 65°C, where the proteins have contracted hard enough to push out their water and the texture goes from tender to springy. Thirty seconds is genuinely the difference between the two.
Scallop muscle is built for a life of clapping a shell shut, so it is dense with fast-twitch fibres and carries almost no connective tissue. There is no collagen here to melt into gelatin and buy you forgiveness, and there is very little intramuscular fat. What you have is myosin and actin, and once those denature past about 60°C they contract and squeeze water out of the cells permanently. A raw scallop's proteins are holding water in. An overcooked one has pushed it out into the pan, and nothing you do afterwards puts it back. That is why every instruction you will read says pull them early, and why the two-minute rest is part of the recipe rather than a suggestion.
Scallop Sizes and How Long Each Side Needs
| Scallop Grade | Count per Pound | Side A Sear Time | Side B Butter Baste | Target Core Temp |
|---|---|---|---|---|
| Colossal (U-10) | 8 to 10 | 100-110 seconds | 45-60 seconds | 49-52°C / 120-125°F |
| Jumbo (U-12) | 10 to 12 | 90 seconds | 40-45 seconds | 49-52°C / 120-125°F |
| Large (10/20) | 14 to 18 | 75 seconds | 30 seconds | 49°C / 120°F |
| Bay Scallops (Small) | 70 to 100 | Not suited to hard searing; they release water and steam | N/A | 46°C / 115°F |
| U-8 or Larger (very thick) | 6 to 8 | 2 to 2.5 minutes | about 70 seconds | 49-52°C / 120-125°F |
| Wet-Packed ('water added') | Varies by brand | Will not brown, whatever you do; they steam instead | Not applicable | Not suitable for searing |
Ingredients
Checklist- 500g (approx. 1 lb) Dry-Packed Sea Scallops (U-10 or U-12 count)
- 1 tsp Flaky Kosher Sea Salt
- 1/2 tsp Freshly ground white pepper
- 1.5 tbsp Avocado Oil or Grapeseed Oil (high smoke point)
- 2 tbsp European Unsalted Butter (cold, cubed)
- 1 sprig Fresh Thyme
- 1 Lemon (halved, for fresh juice finishing)
- 1 tbsp Fresh Flat-Leaf Parsley, finely minced
Step-by-Step Method
- 1 Remove Tough Abductor Muscle. Feel along the side of each scallop for the small rectangular fibrous hinge (the abductor side muscle). Gently pinch and peel it off; it turns tough and leathery when cooked.
- 2 Salt and Surface Dehydration. Place the scallops on a plate lined with a double layer of paper towels. Season the top lightly with fine salt and rest 10 minutes. Use fresh paper towels to press firmly against all surfaces until completely bone-dry.
- 3 Preheat Skillet to High Thermal Energy. Set a heavy cast iron skillet over medium-high heat for 5 minutes until faintly wisps of heat rise. Add 1.5 tbsp avocado oil; it should shimmer and sheet instantly across the metal.
- 4 Lay Scallops Clockwise. Place scallops flat-side down in a clockwise ring around the outer edge of the pan, ending with one or two in the center. Give them at least 1 inch of clearance so expelled steam vents freely.
- 5 The Undisturbed Sear. Do not touch, shake, or nudge the scallops for 90 seconds. Watch the base: a golden ring will climb 2-3mm up the side and the scallop will self-release from the metal.
- 6 Flip and Cold Butter Baste. Flip each scallop using a thin fish spatula. Immediately drop the cold butter and thyme sprig into the center. Tilt the pan and spoon foaming butter over each scallop for 30 to 45 seconds.
- 7 Immediate Plate Transfer. Remove immediately to a warm plate. Squeeze fresh lemon juice over the tops and scatter minced parsley. Rest for 2 minutes and serve promptly.
Diagnosing a Disappointing Batch of Scallops
| What Went Wrong | Most Likely Cause | The Fix Next Time |
|---|---|---|
| Scallops boiled in liquid with no crust at all | Wet-packed treated scallops, or the pan was overcrowded and they steamed each other | Buy dry-packed scallops marked 'dry' or 'diver', and leave at least an inch between each piece in the pan |
| Scallops stuck firmly to the pan | Flipped too early, before a crust had formed and released the protein from the metal | Wait the full 90 seconds to two minutes; when the crust is ready the scallop detaches on its own |
| Rubbery, stringy texture | The centre went past 55°C (130°F), either in the pan or during the rest | Pull at 49 to 52°C (120 to 125°F) and let carryover heat finish the middle on the plate |
| Butter scorched and the whole pan tastes acrid | The oil was already past its smoke point when the cold butter went in | Slide the pan off the heat for 20 seconds before the butter goes in, and add it cold and cubed rather than in one lump |
| Scallops curled up and the edges went tough | Heat was too high, so the outside set and contracted before the centre had warmed through | Drop to a steady medium-high and pull on temperature rather than colour; a flat scallop is a gently cooked one |
| They were cooked right but cold by the time they reached the table | Cooked in three batches while the first batch waited on the counter | Sear in two batches at most, or use a wider pan, and hold the finished ones on a warm plate in a low oven for no more than five minutes |
| Only one side has any colour | The pan lost too much heat after the flip, or the second side was rushed | Give side one 90 seconds to two minutes and side two a full 45 to 60 seconds, and let the pan recover for 20 seconds between batches |
Key Advantages & Science
- ✓Yields a glass-crisp, deep amber caramelized Maillard crust.
- ✓Maintains a tender, sweet, buttery sashimi-grade interior.
- ✓Cooking takes under 5 minutes from skillet to plate.
- ✓Eliminates cloudy chemical foam by using untreated dry-packed scallops.
Important Considerations
- !Requires dry-packed (untreated) scallops, which carry a premium price.
- !Extremely narrow margin of error — overcooking by 30 seconds turns them rubbery.
- !High heat causes light oil splatter; requires an active exhaust hood.
The Pan, the Spatula and the Thermometer
Reading the Sear: Notes From Testing
Butter, Caper and Citrus Directions
Add a tablespoon of rinsed capers to the pan with the butter on the second side. They crisp in the foam and cut straight through the richness. Do not add them any earlier, or they will burn black before the scallops are done.
Mash equal parts white miso and soft butter with a little lemon zest, and spoon it over the scallops as they rest. Miso brings salt and glutamates rather than sugar, so it deepens the crust instead of sweetening it.
Blanch 300g of peas, blend with a knob of butter, a squeeze of lemon and enough stock to loosen, then spread it across the plates first. The sweetness of the peas picks up the sweetness in the scallop without competing with it.
Crisp 60g of diced pancetta in the pan first and set it aside, then sear the scallops in the rendered fat. Deglaze with 60ml of dry sherry once the scallops are out, swirl in cold butter, and spoon the sauce over. The fond the pancetta leaves does most of the work.
What to Serve With Seared Scallops
Scallops are a plate-immediately dish, so build everything else first and leave the searing to the last four minutes. They want something soft underneath and something sharp on top. A cauliflower or parmesan puree, a loose mash of peas or broad beans, or a plain risotto all work because they let the scallop sit on the plate rather than roll around it. If you would rather keep the meal lighter, a warm salad of lentils or butter beans dressed with lemon and good oil does the same job. Something crisp helps too, whether that is a shard of toasted sourdough or a handful of quickly fried capers. On top, keep it to lemon, parsley and the browned butter left in the pan. Scallops are sweet and delicate, and a heavy sauce buries them. To drink, an unoaked white with real acidity is the right call: Muscadet, Chablis, Sancerre, Vermentino or a dry Riesling. Avoid anything oaky or buttery, which competes with the butter in the pan and makes the whole plate taste flat. A dry fino sherry is a very good alternative if you want more savoury edge.
Why Seared Scallops Never Reheat Well
Cooked scallops are best consumed immediately. If storing, refrigerate airtight for up to 24 hours.
Reheat gently in a warm pan with a splash of broth for 60 seconds; microwave heating will turn the delicate proteins instantly into rubber.