Dark Meat and White Meat Need Different Numbers
| Part | Target Pull Temp | Final Rested Temp | Texture & Safety |
|---|---|---|---|
| Breast Meat | 68°C (155°F) | 71°C (160°F) | Extremely juicy, safe with 8 min carryover rest |
| Thighs & Legs | 78°C (175°F) | 82°C (180°F) | Collagen fully melted into gelatin, tender |
| Wing Joints | 80°C (176°F) | 83°C (181°F) | Cartilage softened, skin fully rendered and crisp |
| Breast at 74°C | Overshot target | 77°C (171°F) | Safe but visibly drier, fibers beginning to tighten |
| Breast at 63°C | Pulled too early | 66°C (151°F) | Needs several minutes held at temperature to pasteurise |
| Thigh at 71°C | Pulled too early | 74°C (165°F) | Safe to eat but rubbery; collagen has not yet converted |
What Dry Brining Does to Skin and Muscle Fibre
Dry-brining utilizes osmosis and protein restructuring. When salt is applied to poultry skin, it initially draws out moisture through osmotic pressure. Over the next several hours, the salt dissolves into this surface moisture, creating a concentrated brine that is reabsorbed deep into the muscle tissues. Salt alters the structure of myosin and actin proteins, increasing their water-holding capacity so the meat retains juice during roasting while the skin dehydrates in the refrigerator.
The comparison with wet brining explains why this method has largely replaced it in professional kitchens. A wet brine does season the bird and does increase its weight, but most of that added weight is plain water held loosely in the muscle, and it dilutes the chicken's own flavor. Worse, it saturates the skin, and saturated skin cannot crisp — it has to lose that water before it can brown, which is why wet-brined birds so often emerge pale and flabby. Dry-brining achieves the same interior seasoning through the same osmotic mechanism, then spends the remaining hours doing the opposite of a wet brine to the exterior: drying it out.
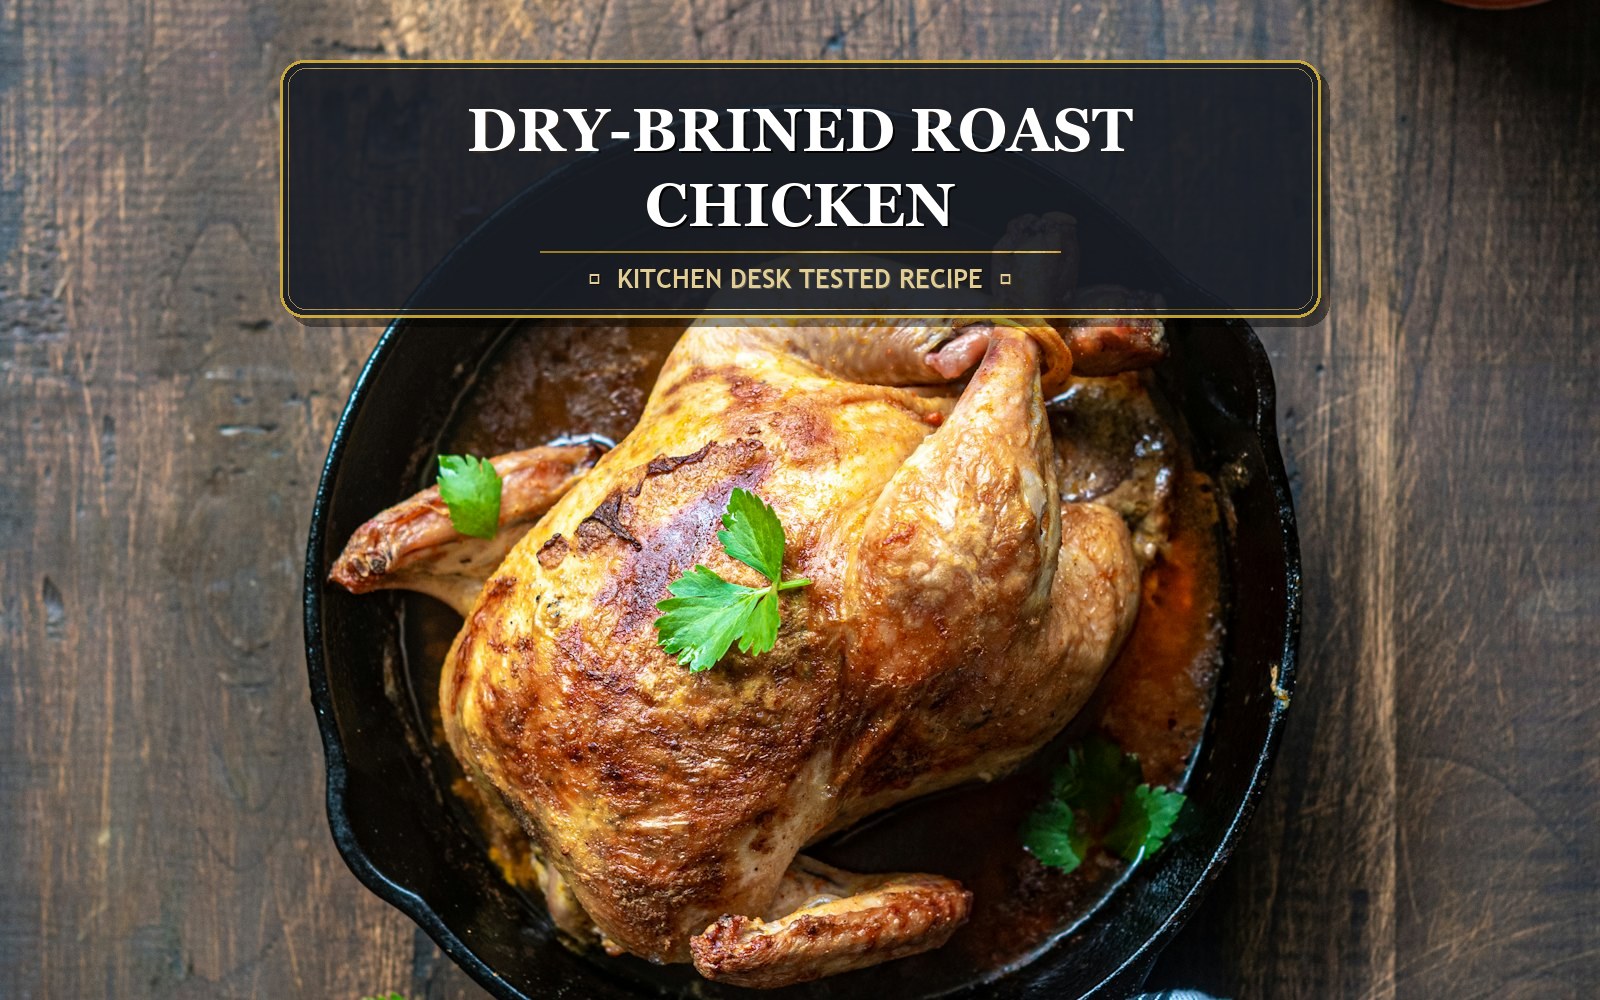
Crisp skin is fundamentally a dehydration problem. Chicken skin is roughly half water, and while that water remains, the surface cannot exceed 100°C — every joule of heat goes into evaporation rather than browning. Only once the skin has dried does its temperature climb into the range where Maillard browning and fat rendering take over, and the collagen sheets within it contract and set into something brittle. Eighteen to twenty-four hours uncovered in a cold, circulating refrigerator removes far more of that water than patting with paper towels ever could, which is why the same oven produces radically different skin depending on what happened the day before.
The central difficulty of roasting a whole bird is that it is really two different cuts attached to each other. Breast is lean, pale muscle built for short bursts of activity, with little connective tissue and almost no fat; it is at its best around 68-71°C and turns dry and cottony above 74°C. Thigh and leg are dark, hard-working muscle laced with collagen and fat, and they need to reach 78-82°C for that collagen to hydrolyse into gelatin — below that they are unpleasantly rubbery. The bird therefore has two correct temperatures roughly ten degrees apart, and every roasting technique is an attempt to reach both at once.
Geometry does most of the work here, which is why the bird's position matters. The legs sit on the outside of the carcass and are exposed to circulating oven air, while the breast is thick, insulated by the ribcage, and shielded by the cool cavity. Left alone in a hot oven, the legs naturally run ahead of the breast, which is exactly what you want. This is also why stuffing the cavity with dense bread stuffing is a mistake: it acts as a heat sink, forces you to roast much longer for the centre to reach a safe temperature, and guarantees an overcooked breast. Lemon, garlic and herbs are light and open enough to let air circulate.
The 71°C figure printed on packaging deserves context, because pulling the breast at 68°C sounds like cutting a corner and is not. Food safety depends on both temperature and time — pasteurisation is a rate, not a threshold. Salmonella is reduced by the required amount instantly at 74°C, but also in about thirty seconds at 68°C and roughly three minutes at 66°C. A breast pulled at 68°C sits above that temperature throughout its rest thanks to carryover, so it is comfortably pasteurised while remaining several degrees juicier than one taken to 74°C in the oven.
That rest is doing two things simultaneously. Carryover cooking continues to move heat from the hot exterior toward the cooler centre, typically adding three to five degrees to a bird this size, which is why you pull early rather than on target. At the same time the muscle fibers, which have contracted under heat and driven liquid toward the centre under pressure, relax and reabsorb it. Carve a chicken straight from the oven and that liquid runs onto the board; wait fifteen minutes and most of it stays in the meat. Rest the bird uncovered or loosely tented — sealing it under foil traps steam against the skin and undoes the dehydration you spent a day achieving.
Key Advantages & Science
- ✓Delivers deeply seasoned meat all the way to the bone
- ✓Produces paper-thin, crackling-crisp skin
- ✓Much cleaner and easier than dealing with large buckets of wet brine
- ✓Needs no basting, trussing gymnastics, or flipping mid-roast
- ✓Leaves a carcass and rendered fat that make excellent stock
Important Considerations
- !Requires 12 to 24 hours of advance preparation in the refrigerator
- !Needs uncovered fridge space on a rack, which is awkward in a full refrigerator
- !Salt quantity must be adjusted by brand and grind, or the bird turns out too salty
- !Breast and thigh finish at different temperatures, so a thermometer is genuinely necessary
Ingredients
Checklist- 1 Whole Chicken (approx. 1.8kg / 4 lbs)
- 1.5 tbsp Diamond Crystal Kosher Salt (approx. 15g, or 1% of the bird's weight)
- 1 tsp Freshly ground black pepper
- 1 tbsp Olive oil
- 1 Lemon (halved)
- 1 head Garlic (halved crosswise)
- 4 sprigs Fresh Rosemary & Thyme
- 1 tsp Baking powder, optional (mixed into the salt for extra-crisp skin)
Step-by-Step Method
- 1 Pat Dry & Salt: Pat the bird dry with paper towels, inside and out. Weigh it, then measure salt at roughly 1% of that weight — about 15g for a 1.8kg bird. Season evenly all over, under the breast skin, and inside the cavity. Place on a wire rack inside a baking sheet and refrigerate uncovered for 18–24 hours.
- 2 Temper Before Roasting: Take the bird out of the fridge 45 minutes before it goes in the oven. A chicken starting at room temperature roasts far more evenly than one straight from a 4°C shelf, and the breast is less likely to overshoot while the thighs catch up.
- 3 Preheat Oven: Preheat oven to 220°C (425°F) with a rack in the lower third. Give it a full 20 minutes after the indicator light goes off — most ovens read up to 15°C hotter than their true cavity temperature at that moment.
- 4 Cavity Aromatics: Stuff the cavity with the halved lemon, garlic head, and fresh herbs. Tie the legs loosely with butcher's twine — loosely is deliberate, since tight trussing shields the thighs and slows them down exactly where you want them to run ahead.
- 5 Roast: Brush the skin lightly with olive oil and add no salt at this stage; the dry brine has already seasoned it. Roast for 50 to 60 minutes without opening the door more than necessary. Do not baste — every basting drops the oven temperature and re-wets the skin you spent a day drying.
- 6 Probe Check: Pull when the thickest part of the breast registers 68°C (155°F) and the thigh, probed near but not touching the bone, hits 78°C (175°F). If the breast reaches target while the thighs lag, tent the breast loosely with foil and give the legs another 8-10 minutes.
- 7 Rest: Transfer to a carving board and rest for 15 minutes, uncovered or only loosely tented. Carve the legs and thighs first, then the breasts off the bone in whole lobes before slicing them across the grain. Pour any board juices back over the meat and keep the carcass for stock.
Roasting Vessel, Rack and Probe
Roast Chicken Fault Diagnosis
| Symptom | Likely Cause | Correction |
|---|---|---|
| Skin pale and rubbery | Bird was covered in the fridge, or roasted below 200°C | Dry uncovered on a rack a full 18-24 hours and roast at 220°C |
| Breast dry, thighs perfect | Cooked to a single temperature, or breast left unshielded too long | Pull the breast at 68°C and tent it with foil while the legs finish |
| Thighs rubbery at the joint | Pulled before collagen converted, around 71°C | Push thighs to 78-82°C; unlike breast, they improve with more heat |
| Whole bird tastes bland inside | Salted only hours before, or salt applied only on top of the skin | Salt 18 hours ahead, under the skin and inside the cavity as well |
| Unpleasantly salty | Table salt or Morton kosher used at Diamond Crystal quantities | Weigh salt at 1% of the bird's weight rather than measuring by spoon |
| Juices ran out on the board | Carved immediately out of the oven | Rest 15 minutes so contracted fibers relax and reabsorb liquid |
| Underside soggy while top crisped | Bird sat in its own rendered juices | Roast on a rack or on a bed of thickly sliced onion so air reaches underneath |
Test Kitchen Notes
Carving, Resting and What Goes on the Table
A whole roast chicken is a centrepiece that carries almost any accompaniment, so choose based on the fat. Something acidic is the most useful counterweight: a sharp green salad dressed with mustard vinaigrette, braised red cabbage, or roasted lemon halves squeezed over the carved meat. For starch, anything that will absorb the pan juices earns its place — roast potatoes in the rendered fat, a soft polenta, buttered egg noodles, or good bread to mop the board. Green vegetables with some bitterness balance the richness well: charred broccolini, braised chard, green beans with almonds, or buttered peas with mint. If you made pan gravy from the drippings, keep the rest of the plate simple so it does not compete. Carve at the table if the skin turned out well, since it is the part people remember, and serve the legs and breast together so nobody gets only white meat. Wine can go either way — a lightly oaked Chardonnay or a medium-bodied Pinot Noir both work, and a dry cider is an underrated match for the crisp skin.
Spatchcock, Butterflied and Beer Can
Cut out the backbone with kitchen shears and press the bird flat. Everything now sits at a similar depth, so breast and thigh finish much closer together and total roasting time drops to around 45 minutes at 220°C. The skin is more exposed and crisps even better; you lose only the presentation of a whole bird.
Mash softened butter with minced garlic, chopped thyme, lemon zest and a little smoked paprika, then push it under the breast skin after dry-brining. The fat conducts heat into the breast and bastes it from within. Do this on roasting day, not before the fridge rest, or the butter will block skin dehydration.
Rub the bird with olive oil, za'atar and sumac before roasting, and scatter lemon wedges and red onion in the pan. The sumac's acidity balances the rendered fat, and the herbs toast rather than burn because they sit in oil rather than directly on dry skin.
Toss halved waxy potatoes with olive oil and rosemary in the pan and set the bird directly on top. The potatoes cook in rendered chicken fat, which is arguably the best reason to roast a chicken at all. Give them a 15-minute head start in the oven so they finish alongside the bird.
Leftovers, Stock and the Carcass
Strip the meat from the bones within two hours of roasting rather than refrigerating the whole bird — cooling is faster, storage is more compact, and you are far more likely to actually eat the leftovers. Sealed in the refrigerator, cooked chicken keeps for three to four days. Store dark and white meat separately if you can, since the drier breast benefits from being kept in a little of the pan juices or stock to stop it drying further. The skin will not stay crisp under any storage conditions, so eat it on the day. Reheat gently and covered — a 150°C oven for 10-15 minutes with a splash of stock in the dish, or a covered pan over low heat — because chicken breast that was pulled at the correct temperature has no margin left before it turns dry. Cold roast chicken is genuinely good on its own terms and makes better sandwiches, salads, tacos and fried rice than reheated chicken does. Shredded meat freezes well for up to three months, especially in a little stock to prevent freezer burn. The carcass should go straight into a pot or into the freezer for stock; three hours of simmering with aromatics converts it into a litre or more of gelatinous stock that is worth as much as the roast itself.